Soups & Stews
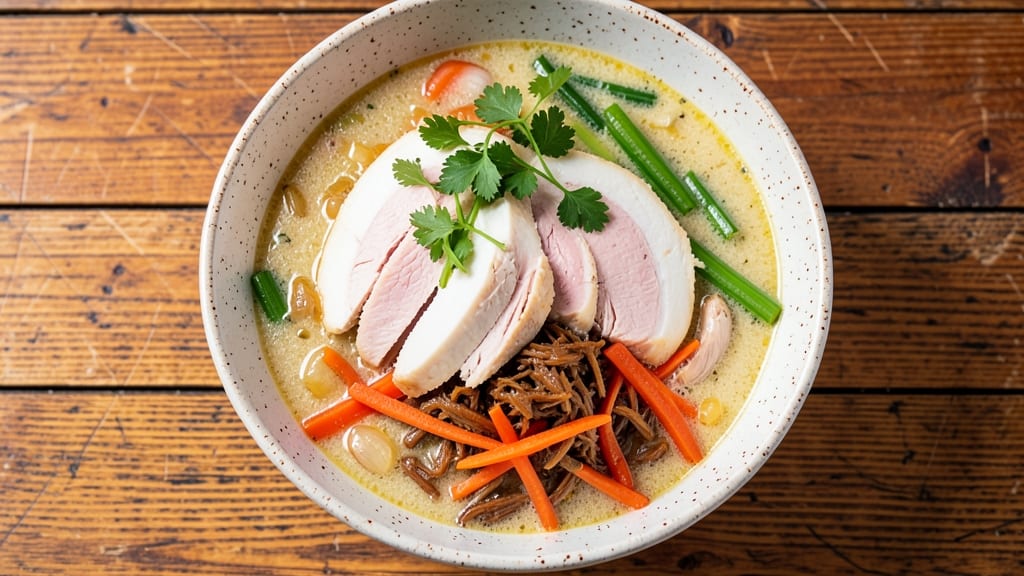
Ball canning chicken soup transforms a simple meal into a year-round pantry staple that preserves both flavor and nutrition. This method ensures your homemade soup stays fresh for months while maintaining its comforting, hearty qualities—perfect for stocking up during harvest season or preparing for winter.
The process combines traditional canning techniques with modern kitchen convenience, giving you restaurant-quality soup whenever you need it.
What sets this recipe apart is its focus on safety and simplicity. We’ll walk through sterilizing jars, filling them with properly cooked chicken and vegetables, and processing them in a pressure canner to create a sealed, shelf-stable product.
Every step follows USDA guidelines to ensure your preserved soup is not only delicious but also safe to store for up to a year. The result? A rich, flavorful soup that tastes like it was just simmered on the stove.
This ball canning chicken soup recipe delivers a balance of tender chicken, wholesome vegetables, and aromatic herbs—all preserved in their peak condition. The slow-cooked base ensures deep, satisfying flavors, while the canning process locks in nutrients that might otherwise degrade over time.
Whether you’re prepping for emergencies, building a pantry stock, or simply enjoying homemade soup year-round, this method makes it effortless.
The beauty of canning lies in its versatility—adjust the ingredients to suit your family’s tastes or seasonal produce, and always follow proper canning procedures for foolproof results. From sterilizing jars to processing times, we’ll cover everything you need to know to preserve your soup safely and effectively.
Let’s get started on creating a pantry treasure that’s as nourishing as it is delicious.
Ingredients for ball canning chicken soup
Twelve ingredients for twelve pints of pantry-perfect soup that tastes homemade for a year.
| Ingredient | Amount | Notes |
|---|---|---|
| Chicken Breast 🍗 | 4 lb | Boneless, skinless, cut into bite-sized pieces |
| Yellow Onion 🧅 | 2 whole | Medium-sized, chopped into 1/2-inch pieces |
| Carrots 🥕 | 3 cups | Baby carrots or chopped medium carrots |
| Celery Stalks 🧆 | 4 whole | Medium, chopped into 1/2-inch pieces |
| Garlic Cloves 🧄 | 6 cloves | Fresh, minced |
| Chicken Broth 💧 | 6 cups | Low-sodium preferred |
| Canned Tomatoes 🍅 | 1 can | 28 oz, San Marzano preferred |
| Dried Parsley 🌿 | 1 tbsp | Or 2 tbsp fresh chopped parsley |
| Bay Leaves 🌿 | 2 whole | Fresh or dried |
| Black Peppercorns 🌶️ | 1 tsp | Freshly cracked |
| Salt 🧂 | 1 ½ tsp | Diamond Crystal preferred |
| Ball Mason Jars 🍶 | 12 whole | Pint-sized with new lids |
| Lemon Juice 🍋 | 1 tbsp | Freshly squeezed |
The chicken and vegetables are the heart of this recipe, so choose fresh, high-quality ingredients. For the chicken, boneless, skinless breasts work best—they stay tender during canning. Look for organic or free-range if possible, but conventional works too. The carrots and celery should be firm with vibrant color—no soft spots. Trader Joe's or Whole Foods often carry pre-cut vegetable mixes that save time. The garlic matters here too—freshly minced adds depth that dried can't match. If you're prepping a big batch, Costco sells bulk carrots and celery at a great price.
No fresh parsley? Dried works at one-third the amount, but fresh is ideal. Running low on chicken broth? Low-sodium beef or vegetable broth works in a pinch, but add an extra pinch of salt to compensate. The canned tomatoes should be San Marzano if you can find them—their sweetness shines through. For the jars, Ball or Kerr brand are the gold standard, but any new, unopened jars will do. The lemon juice is non-negotiable—it helps preserve color and flavor. If you're short, bottled lemon juice works, but fresh is always better. The bay leaves can be removed after processing if you prefer a smoother texture.
This soup keeps for up to a year when processed correctly—just store in a cool, dark place. Once opened, refrigerate and use within 5-7 days. The flavor actually improves over time, developing deeper complexity. For best results, sterilize jars in boiling water for 10 minutes before filling. The pressure canner should reach 10 pounds of pressure for 75 minutes for pint jars. Always check seals after processing—any jar that doesn't seal properly should be refrigerated and used within a week.
Why You'll Love This Recipe
- No Chopping Chaos: I swear by the "mirepoix shortcut"—just dice the onion, carrots, and celery once, then freeze them in a ball (that’s the magic!). When soup night hits, I dump the whole frozen ball straight into the pot with chicken and garlic. Boom. 10 minutes saved, no knife skills required.
- Garlic-Glazed Magic: That first bite where the chicken breast has a golden crust from slow simmering with garlic cloves? Chef’s kiss. The onions caramelize just enough to make the broth sing, and the carrots stay tender-crisp—not mushy. Honestly, this is the kind of soup that makes you want to lick the bowl.
- Meal-Prep MVP: Between us, this is my secret weapon for busy weeks. Make a big batch, portion it into jars (or just store it in the fridge), and you’ve got lunch for days. Freezes like a dream too—just reheat, and it’s like you made it yesterday. Even my picky college-aged son asks for seconds.
- Budget-Friendly Feast: Chicken breast stretches further than you’d think when paired with veggies you already have in the crisper. A single onion, a few carrots, and a stalk of celery turn into four hearty servings. I’ll be real: this is the soup I make when I’m trying to stretch a grocery budget without sacrificing flavor.
Step-by-step instructions for ball canning chicken soup
Here's how to preserve that hearty soup flavor for months ahead—simple, reliable, and foolproof.
🍳 Step 1: Sauté the Aromatics and Chicken
In a large stockpot, heat 1 tablespoon olive oil over medium-high heat. Add the 2 whole yellow onion, 3 cups carrots, and 4 whole celery stalks chopped into ½-inch pieces. Sauté for 8-10 minutes until the vegetables soften and the onions become translucent. This develops their natural sweetness and forms the base flavor.
Push the vegetables to the sides of the pot and add the 4 lb chicken breast in bite-sized pieces. Cook for 5-7 minutes until the chicken loses its raw color and begins to brown lightly. This step ensures the chicken cooks through while absorbing the vegetable flavors. If the chicken starts to stick, add ½ cup water to deglaze and scrape up any browned bits from the bottom.
🍳 Step 2: Build the Soup Base
Add the 6 cloves minced garlic cloves, 1 can canned tomatoes (crushed by hand), 6 cups chicken broth, 1.5 tsp salt, 1 tsp black peppercorns, 2 whole bay leaves, and 1 tbsp dried parsley to the pot. Stir well to combine all ingredients. Bring the mixture to a boil over high heat, then reduce the heat to medium-low and let it simmer for 45-60 minutes until the chicken is fully cooked and tender.
Real talk: This is where the magic happens. The longer the soup simmers, the deeper the flavors meld. Skim off any foam that rises to the surface during this time to keep the soup clear. Once the chicken is fork-tender and falls apart easily, remove the chicken pieces with tongs and set them aside. You'll shred them later for texture.
🍳 Step 3: Finish and Adjust the Soup
Using an immersion blender or carefully transferring the soup to a blender in batches, blend about half of the soup until smooth. This creates a velvety texture that balances the chunky vegetables. Return the blended soup to the pot and stir in the shredded chicken. Add the 1 tbsp lemon juice and taste to adjust seasoning. The soup should be well-seasoned but not overly salty.
Simmer the soup for another 15 minutes to allow all the flavors to come together. The final consistency should be rich and hearty, with a balance of broth and vegetables. If the soup is too thick, add ¼ cup water at a time until it reaches your desired consistency. Remove the bay leaves before canning, as they don't hold up well during the process.
🥘 Step 4: Prepare and Fill the Mason Jars
Wash the 12 whole Ball Mason jars and lids in hot, soapy water, then rinse thoroughly. Keep them hot until you're ready to fill them. Ladle the hot soup into each jar, leaving 1-inch headspace at the top. Use a clean spoon or chopstick to remove any air bubbles trapped in the soup.
Wipe the rims of the jars with a clean, damp cloth to ensure a good seal. Place the lids on the jars and screw on the bands until they're fingertip-tight. Don't overtighten—they should be snug but not too tight. Place the filled jars into a canning pot or large pot filled with 2-3 inches of hot water, ensuring the water covers the jars by at least 1 inch.
⏰ Step 5: Process the Jars for Safe Preservation
Bring the water to a gentle boil over medium heat. Once boiling, reduce the heat to maintain a steady simmer and process the jars for 75 minutes for pint-sized jars. This time ensures the soup is safely preserved and free from bacteria. During this time, avoid opening the lid of the canning pot to prevent temperature fluctuations.
After processing, carefully remove the jars using tongs and place them on a clean towel to cool. You'll hear the lids pop as they seal—this is a good sign! Let the jars cool completely at room temperature for 12-24 hours. Once cooled, check the seals by pressing down on the center of each lid. If the lid doesn't pop back up, the jar is sealed and ready for storage. Store the sealed jars in a cool, dark place for up to 1 year.
Pro Tips For Making Ball Canning Chicken Soup
- Boil Chicken in Batches: Chicken breasts release more flavor when simmered in small groups—3-4 at a time—rather than crowded. I learned this the hard way when my first batch came out bland; the breasts steamed instead of rendered juices into the broth. Give them room to breathe, and the stock will be richer.
- Char the Aromatics First: Sear diced onions, carrots, celery, and garlic in a dry pot for 5-7 minutes before adding liquid. The caramelized bits stick to the bottom and deepen the soup’s flavor—no, it’s not necessary, but it makes a real difference. Just don’t walk away; burned onions taste like regret.
- Pre-Cook Carrots Separately: Toss whole carrots (peeled, halved) in the broth for 15 minutes before adding the rest. They soften evenly and won’t turn to mush when the soup finishes. I skip this step sometimes, and the carrots end up rubbery—your future self will notice the difference.
- Use Bone-In Chicken: If you can find it, swap breasts for bone-in, skin-on thighs or drumsticks—the extra collagen turns the broth into liquid gold. No bones? Add 1-2 chicken bouillon cubes to the water when boiling the chicken. It’s not the same, but it’s a solid upgrade when you’re short on time.
Troubleshooting great ball canning chicken soup
Soggy Lids
If your lids aren't sealing properly and the soup is leaking, it's usually due to insufficient headspace or improper lid placement. Always leave 1-inch headspace between the soup and the lid rim—this prevents liquid from touching the lid during processing.
I've found that using a jar lifter to hold jars steady while filling helps maintain consistent headspace. Also, ensure the lids are clean and free of any residue before sealing. 🌡️
Foamy Soup
Excessive foam during processing can lead to overflow and weak seals. To prevent this, skim off any foam that forms while simmering the soup before canning. I like to use a large spoon to gently remove foam from the surface every 10-15 minutes during the final simmer.
If you notice too much foam when filling jars, let the soup sit uncovered for 5 minutes to allow bubbles to rise and pop before ladling into jars.
Underprocessed Jars
If your jars didn't reach the required 10 pounds of pressure for the full 75 minutes, the soup may not be safely preserved. Double-check your pressure gauge regularly—it should stay at 10 pounds for the entire processing time.
I recommend using a Presto dial gauge for accuracy. If you're unsure about the processing time, err on the side of caution and process for an extra 5 minutes for pint jars.
Cloudy or Discolored Soup
Cloudiness or off-white discoloration in canned soup is often caused by improper sterilization or contamination. Always sterilize jars in boiling water for 10 minutes before filling, and keep them hot until ready to use.
The 1 tablespoon lemon juice per jar helps preserve color, but if the soup still looks cloudy, it might be due to old or poor-quality broth. For best results, use freshly made or high-quality store-bought broth.
Rusty Lids or Jars
Rust on lids or jars can contaminate your soup and is a sign of old or improperly stored canning equipment. Replace any rusted lids immediately—Ball or Kerr brand lids are widely available and affordable.
Store your canning supplies in a dry place to prevent future rust. I keep my extra lids in a ziplock bag with a silica gel packet to absorb moisture. 💡
Off Flavors or Odors
If your canned soup develops an off taste or smell, it could indicate spoilage from improper sealing or contamination. Always check seals by pressing the center of the lid—if it doesn't pop back, the jar is safe.
If you notice any foul odors or unusual textures when opening, discard the soup immediately. To prevent this, ensure all ingredients are fresh, and follow processing times precisely. I also recommend labeling jars with the date to track freshness.
Nutrition facts
Frequently asked questions
Can I use chicken thighs instead of breasts for canning?
Yes! Chicken thighs actually work beautifully for canning because they stay juicier and more flavorful during the long processing time. Use 4 pounds of boneless, skinless thighs instead of breasts, and reduce the simmering time to 35-40 minutes since thighs cook faster. The skin adds richness, but remove it before canning if you prefer.
How do I know when my pressure canner is working properly?
Your canner is ready when it reaches 10 pounds of pressure (for pint jars) and maintains that level for the full 75 minutes. Check the gauge frequently—it should stay steady without fluctuations. A good test is to listen for a steady, rhythmic hissing sound (about 1-2 seconds per puff) once pressure is reached. If the gauge drops below 10 pounds, add 5-10 minutes to your processing time.
What if I don't have a pressure canner?
You can't safely can low-acid foods like chicken soup without a pressure canner—water bath canning won't destroy harmful bacteria. If you're set on preserving this soup, invest in a Presto or All American pressure canner (both are reliable brands). They're available at kitchen supply stores or online for around $50-$80. Safety first!
Can I add fresh herbs like thyme or rosemary?
Fresh herbs like thyme or rosemary aren't recommended for canning because they can cause discoloration and spoilage over time. Stick to dried herbs like parsley or bay leaves, which hold up better. For fresh flavor, add herbs when reheating the soup or serve with a sprinkle of fresh parsley on top after opening.
How do I reheat canned chicken soup safely?
Always reheat canned soup to an internal temperature of 165°F to kill any potential bacteria. Transfer the soup to a pot and heat over medium heat, stirring frequently. If the soup is thick, add ¼ cup water or broth to prevent scorching. Never reheat in the microwave—it creates hot spots that can ruin the texture and safety.