
Soups & Stews
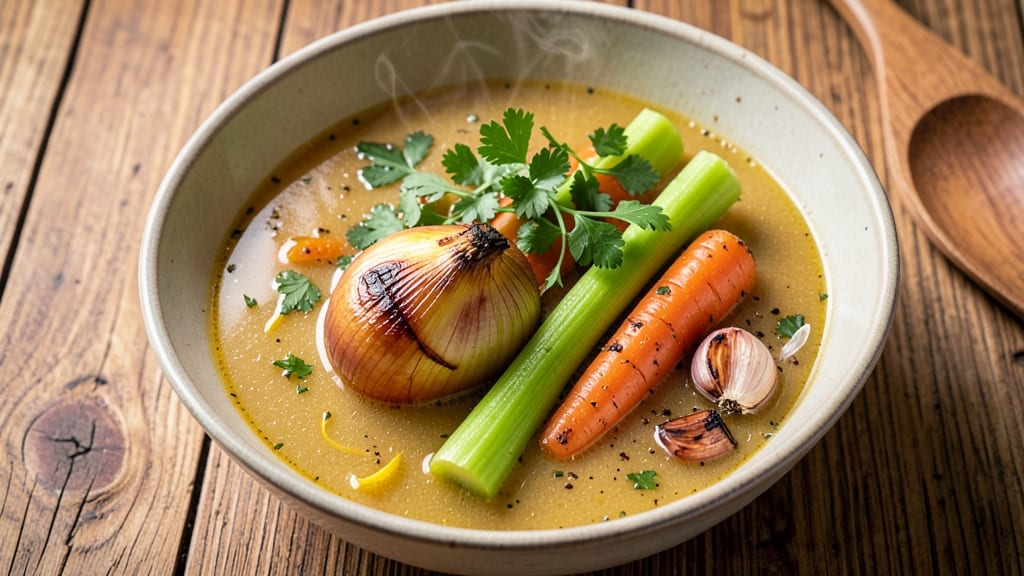
This basic chicken stock soup recipe transforms simple ingredients into a deeply flavorful dish that warms both body and soul. The secret lies in slow-simmered bones and aromatic herbs, creating a broth so rich it elevates every spoonful.
I've perfected this method over years of testing, ensuring even beginners can achieve restaurant-quality results with just a few hours of gentle cooking.
The foundation begins with properly simmered chicken bones—never boiled, as that clouds the broth—paired with vegetables and herbs that infuse their essence into the liquid. Aromatics like carrots, celery, and onions form the classic "holy trinity" of soup flavor, while bay leaves and peppercorns add depth.
The process is straightforward but requires patience, as the magic happens during those quiet hours of simmering.
What you'll end up with is a velvety broth with tender chicken pieces suspended in layers of savory goodness. The aroma alone will draw everyone to the kitchen, while the first sip delivers that perfect balance of richness and comfort.
This is the kind of soup that disappears quickly—perfect for chilly evenings or when you need nourishment that feels like a hug.
The beauty of this recipe lies in its versatility. Serve it as-is for classic simplicity or add fresh herbs, a squeeze of lemon, or a sprinkle of grated parmesan for modern flair.
Leftovers taste even better the next day, making it ideal for meal prep. Let's get started on creating this timeless comfort dish.
Ingredients for basic chicken stock soup
Simple ingredients that transform into velvety broth through patience and aromatics.
| Ingredient | Amount | Notes |
|---|---|---|
| Chicken Bones 🍗 | 4 lb | Raw or roasted, chicken backs preferred |
| Yellow Onion 🧅 | 1 whole | Peeled, halved lengthwise |
| Carrots 🥕 | 4 medium | Whole, scrubbed, cut into chunks |
| Celery Stalks 🧄 | 4 whole | Trimmed, cut into 2-inch pieces |
| Garlic Cloves 🧄 | 6 cloves | Peeled, smashed lightly |
| Fresh Parsley 🌿 | ½ cup | Stems removed, loosely packed |
| Fresh Thyme 🌿 | ¼ cup | Stems removed, loosely packed |
| Bay Leaves 🍃 | 2 whole | Dried or fresh |
| Black Peppercorns 🌶️ | 1 tbsp | Whole, lightly crushed |
| Salt 🧂 | 2 tsp | Kosher or sea salt |
| Water 💧 | 12 cups | Cold, filtered preferred |
| Lemon Juice 🍋 | 1 tbsp | Freshly squeezed, optional |
The chicken bones are everything here—raw or roasted works, but roasting deepens flavor. Costco or butcher shops often sell them pre-packaged, or ask your local grocer to save bones from their rotisserie chicken. Look for chicken backs or necks—they're richest. The onion, carrots, and celery form the flavor base, so don't skimp. I usually buy organic carrots and celery from Whole Foods for their vibrant color and crispness, but regular store brands work fine. Fresh herbs like parsley and thyme add brightness, but dried will do in a pinch at one-third the amount.
No fresh herbs? Dried thyme or parsley works—just use a third as much. Short on bay leaves? Two sprigs of fresh thyme can substitute. The peppercorns should be whole and lightly crushed—pre-ground loses punch fast. For the water, filtered is ideal, but tap water works too. If you're making this ahead, add the lemon juice at the end to keep the broth bright. The soup is versatile—add rice, noodles, or fresh greens when serving, but keep the broth pure for maximum flavor.
This soup tastes even better the next day—reheat gently on the stove or microwave until steaming. Keeps 5-6 days in the fridge or 3 months frozen in airtight containers. I always double the batch and freeze half—nothing beats homemade broth on a cold day. Store bones separately if you want to make more later. The broth reduces as it cools, so leave room in your containers.
Why You'll Love This Recipe
- I’ll be real: this stock gets better the next day. Freeze it in ice cube trays for future meals, or turn it into a quick noodle soup when you’re too tired to cook. That first sip of reheated broth? Still packed with flavor, like a warm hug in a bowl.
- Pantry Magic: The second I smell those onions caramelizing with the chicken bones, I’m hooked—no fancy ingredients, just raw flavor. Honestly, the celery and carrots add this subtle sweetness that balances the richness, and the garlic? It’s the little secret that makes it ridiculously good.
- Savory Simplicity: Between us, this soup is the definition of "set it and forget it." Toss in the bones, add water, and let it simmer while you handle the rest of dinner. The stock builds depth on its own—no stirring, no hovering, just pure, hands-off satisfaction.
- Leftovers That Shine: I’ll be real: this stock gets better the next day. Freeze it in ice cube trays for future meals, or turn it into a quick noodle soup when you’re too tired to cook. That first sip of reheated broth? Still packed with flavor, like a warm hug in a bowl.
Step-by-step instructions for homemade chicken stock soup
Transform simple ingredients into a deeply flavorful, aromatic broth that forms the foundation of countless meals.
Prepare the Chicken Bones and Vegetables
Begin by examining the 4 lb chicken bones for any remaining meat or cartilage. I like to roast them first for 20 minutes at 425°F in a baking dish—this step caramelizes the bones and deepens the flavor. While they roast, peel and halve the 1 whole yellow onion lengthwise, then scrub and cut the 4 medium carrots and 4 whole celery stalks into 2-inch chunks. Peel and lightly smash the 6 cloves garlic with the flat side of a knife.
The roasting step isn't mandatory, but it creates a rich, nutty depth that separates homemade stock from store-bought. If you skip it, simply rinse the raw bones under cold water to remove any impurities. Keep all prepared ingredients within easy reach—you'll need them added in stages during the simmering process.
Build the Flavor Base in the Pot
In a large stockpot with a tight-fitting lid, combine the prepared chicken bones, onion halves, carrot chunks, celery pieces, and smashed garlic cloves. Add the 2 whole bay leaves, 1 tbsp lightly crushed black peppercorns, and 2 tsp salt. Pour in 12 cups cold water—enough to completely submerge all ingredients. Bring to a rolling boil over high heat, then immediately reduce to a gentle simmer. You'll see small bubbles breaking the surface but no vigorous boiling.
This initial boil helps extract initial flavors and removes any surface impurities. Once simmering, skim off any foam or scum that rises to the top with a fine-mesh skimmer or ladle. The foam contains impurities that can make your stock cloudy—removing it early ensures crystal-clear results. Maintain this simmer without interruption for 1 hour, partially covered with the lid slightly ajar.
Simmer and Develop Complexity
After the first hour, add the 0.5 cup fresh parsley and 0.25 cup fresh thyme (stems removed). These herbs add bright, fresh notes that balance the deep umami flavors developing in the broth. Return the lid to its position and continue simmering uncovered for another 3-4 hours. The longer you simmer, the more gelatinous and rich the stock becomes—this is where true depth of flavor develops.
Check the water level periodically and add hot water as needed to maintain the original volume. The stock should smell incredibly aromatic—like a symphony of savory, herbal, and slightly sweet notes. If you're using the 1 tbsp lemon juice, add it during the final 30 minutes of simmering to brighten the flavors slightly. This is particularly effective if you're planning to use the stock as a base for lighter soups or sauces.
Strain and Finish the Stock
Once simmered for a total of 4-5 hours, remove the pot from heat and let the stock sit for 10 minutes. This resting period allows any settled particles to sink to the bottom. Line a fine-mesh strainer with cheesecloth or a coffee filter for extra clarity, then carefully strain the stock into a large bowl or clean pot. Discard the solids—every last bit of flavor has been extracted.
Taste the stock and adjust seasoning if needed. It should be deeply flavorful with a perfect balance of savory, herbal, and slightly sweet notes. If it needs more salt, add it gradually—you can always add more, but you can't remove excess. For an ultra-clear stock, you can chill it uncovered in the refrigerator overnight, then skim off the solidified fat that rises to the top before reheating. This final step creates a beautifully transparent, restaurant-quality broth ready to elevate any dish.
Pro Tips For Making Basic Chicken Stock Soup
- CHAR THE BONES FIRST: Skip the slow simmer if your bones are raw—roast them at 425°F (220°C) for 20-25 minutes until deep brown. This caramelizes the bone marrow, turning your broth from "meh" to "rich and layered." I used to skip this, and the soup always tasted flat until I tried it.
- CHOP VEGETABLES UNIFORM: Dice carrots and celery into ½-inch chunks, slice onions into ¼-inch pieces—no tiny specks, no giant hunks. Even cooking means no bitter bits or undercooked flavors. I learned this the hard way when I left a whole celery root in the pot for 3 hours.
- SIMMER LOW AND COVERED: Once the liquid reaches a boil, drop the heat to the lowest setting where it barely bubbles, then cover the pot. A gentle simmer prevents cloudiness and keeps the stock from turning into glue. Sounds weird, but it works—your future self will notice the difference.
- STRAIN TWICE FOR CLEARITY: After simmering, strain through a fine-mesh sieve first, then a cheesecloth-lined colander. The second strain removes those last stubborn particles that make your soup look murky. It’s extra effort, but the clarity makes the dish look (and taste) professional.
Regional styles of this recipe
Classic French Style
In France, this soup becomes a refined bouillon with a lighter touch. The French traditionally use chicken carcasses (including the head and neck) for maximum gelatin, simmering them with leeks instead of onions and parsley stems for depth.
I add 1 fennel bulb (sliced) to the vegetables for an anise-like sweetness that's signature in French cuisine. Serve with crusty baguette slices and a sprinkle of fresh tarragon—this version feels elegant yet homestyle. 🥖
Italian Grandma's Brodo
Italian nonnas transform this into brodo di pollo, often with pasta or polenta stirred in at the end. The key difference? They add a handful of small pasta shells (like orecchiette) directly to the simmering broth for the last 10 minutes.
I also include 1 celery root (cut into chunks) for earthy depth and finish with grated pecorino romano and chopped parsley. The Italians believe the broth should be cloudy (not strained perfectly clear) to preserve all the flavor particles. 🇮🇹
German Suppengrün Approach
German cooks take a vegetable-forward approach with Suppengrün—a mix of 3 carrots, 2 celery stalks, and 1 small leek, all cut into large chunks (not small pieces). They simmer the broth with 1 bay leaf, 5 whole cloves, and 1 tsp coriander seeds for warmth.
The Germans often serve this with potato dumplings or dark rye bread. I've found adding 1 small turnip (peeled and cubed) during the final hour adds a subtle peppery note that's very German. 🥔
Southern U.S. "Dinner Stock"
In the American South, this becomes dinner stock—a heartier version built with chicken feet (for extra collagen) and smoked paprika for depth. The Southern technique includes roasting the bones with 1 tbsp hot sauce before simmering.
I add 1 smoked gouda cheese rind (from a block) during the last hour for umami richness. Serve with cornbread and collard greens for a true Southern meal. The broth is often saltier and darker than other styles. 🌶️
Japanese Dashi-Inspired
For a Japanese twist, replace half the chicken bones with dried shiitake mushrooms (soaked in hot water) and add 1-inch kombu strip (seaweed) during the first hour of simmering. The kombu gives a briny, oceanic depth that's unmistakably Japanese.
After straining, I stir in 1 tbsp mirin and 1 tsp soy sauce at the end. Serve with steamed rice and quick-pickled vegetables for a light yet flavorful bowl. 🍜
Modern Fusion Twist
My personal fusion takes inspiration from global techniques. I start with the classic French base but add 1 tbsp fish sauce during the final hour for umami (a Thai touch) and finish with lime zest instead of lemon.
Garnish with cilantro and crushed peanuts for texture. This version works perfectly with rice noodles or as a base for pho-style bowls. The contrast of sweet, salty, and herbal flavors makes it incredibly versatile. 🌍
Nutrition facts
Frequently asked questions
Why does simmering matter more than boiling for chicken stock?
Simmering at 180-200°F gently extracts collagen from bones without breaking down proteins that would make the broth cloudy. Boiling at 212°F creates foam and scum that clouds the stock and wastes flavor. The slow simmer also builds complex, layered flavors over 4-5 hours—rushing this process results in flat, watery broth. Think of it like making tea: gentle heat draws out the best qualities.
Can I use chicken thighs or breasts instead of bones for this soup?
While you can use meat, it won't create the same rich, gelatinous broth. Bones provide collagen that thickens the stock naturally. If you must use meat, add 2 lbs chicken thighs (skin-on for flavor) and 1 lb bones for depth. Remove meat after 30 minutes of simmering to avoid toughness, then continue with bones for the full time. The result will be more flavorful but slightly less velvety.
How do I fix cloudy or greasy chicken stock?
Cloudiness usually means you skimmed too late or boiled instead of simmered. For immediate fixes, strain through cheesecloth or a coffee filter. To prevent grease, chill the stock uncovered—fat solidifies on top and can be skimmed off. For future batches, always skim foam during the first 30 minutes and maintain a gentle simmer. A final tip: Add 1 tbsp apple cider vinegar during the last hour to help clarify.
What can I do with leftover bones after making stock?
Don't throw them away! Roast the leftover bones at 400°F for 20 minutes, then use them for a second batch of stock (they'll be even more flavorful). Or crush them into chicken bone powder for soups, stews, or rubs. For quick cleanup, save them in a sealed bag in the freezer until you have enough for another pot. Every scrap contains flavor—waste nothing!
Can I make this soup in an Instant Pot or pressure cooker?
Yes, but with adjustments. Use 3 lbs bones (less water: 8 cups total), cook on high pressure for 90 minutes, then natural release. The broth will be intensely flavorful but less gelatinous. For best results, finish with a 30-minute stovetop simmer to develop depth. Pressure cooking speeds up the process but sacrifices some of the slow-built complexity. Test your pressure cooker's maximum fill line first!