
Soups & Stews
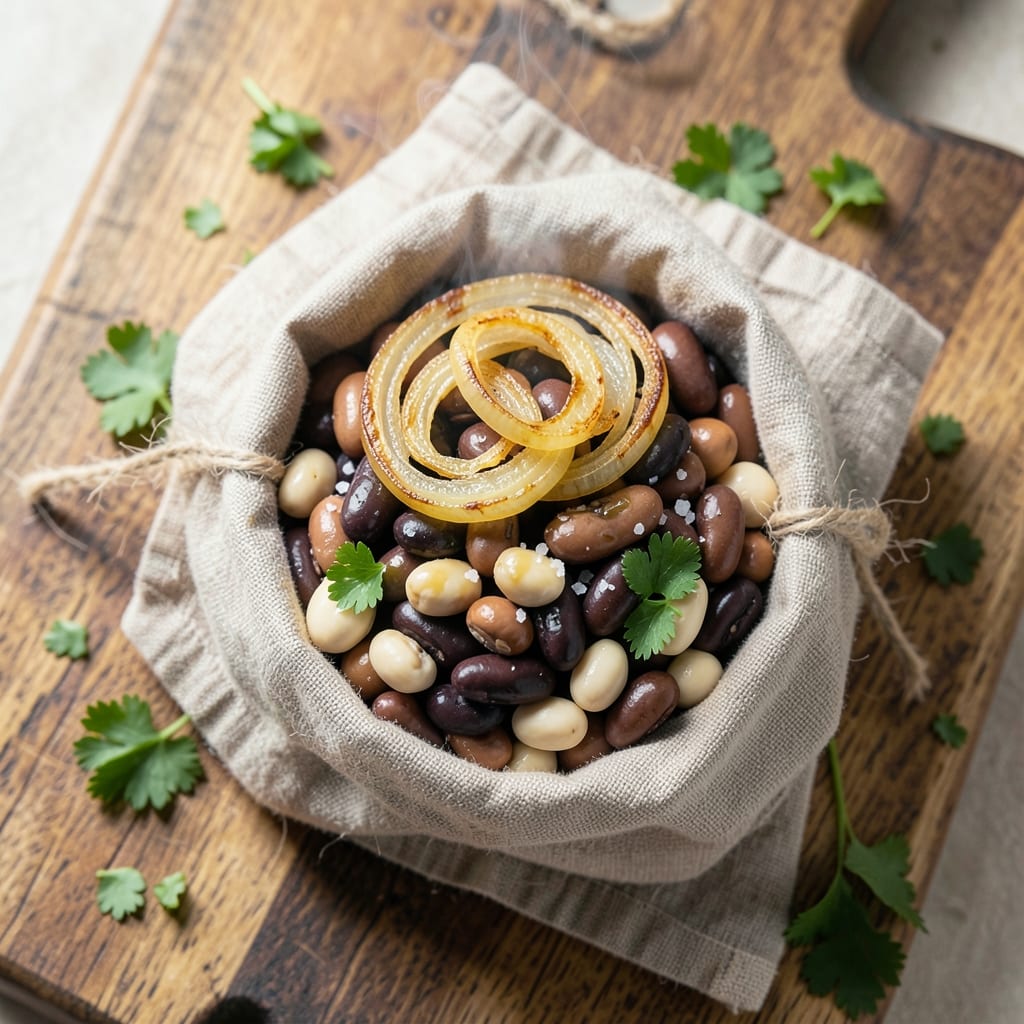
This five bean soup bag recipe is your secret weapon for effortless, freezer-friendly meals that taste like they simmered all day. ⚡ The beauty of this method? You prep everything in one bag, toss it in the freezer, and pull out a hearty, protein-packed dinner whenever you need it—no last-minute chopping or stirring required.
What sets this recipe apart is the balance of three dried beans (for texture and depth) and two canned beans (for convenience), all simmered in a rich, vegan-friendly broth with aromatic vegetables and bold spices. The key technique? Sautéing onions, garlic, and celery first to build flavor before adding everything to the bag—this ensures every spoonful is packed with savory, caramelized notes.
By the time you're done, you'll have a soup that's creamy from the beans, fragrant from the herbs, and hearty enough to stand alone or pair with crusty bread. The best part? Each bag makes four servings, so you can freeze three and enjoy fresh soup tonight. Perfect for meal preppers, busy weeknights, or anyone who loves a soup that feels like a hug in a bowl.
Optional garnishes like fresh parsley or a squeeze of lemon brighten the dish, while a sprinkle of smoked paprika adds depth. Whether you're feeding a family or prepping for the week, this recipe delivers restaurant-quality results with minimal effort. Let's get started!
Ingredients for 5 bean soup bag
Four servings, one bag—these simple ingredients transform into restaurant-quality soup with zero cleanup.
| Ingredient | Amount | Notes |
|---|---|---|
| Dried Great Northern Beans 🌾 | ½ cup | Rinsed and picked over |
| Dried Kidney Beans 🌾 | ½ cup | Rinsed and picked over |
| Dried Black Beans 🌾 | ½ cup | Rinsed and picked over |
| Canned Chickpeas 🌱 | 1 can | Drained and rinsed (15 oz) |
| Canned White Beans 🌱 | 1 can | Drained and rinsed (15 oz) |
| Yellow Onion 🧅 | 1 whole | Diced (about 1 cup) |
| Carrot 🥕 | 2 whole | Diced (about 1 cup) |
| Celery Stalks 🌿 | 2 whole | Diced (about 1 cup) |
| Garlic Cloves 🧄 | 4 cloves | Minced |
| Vegetable Broth 💧 | 2 cups | Low-sodium preferred |
| Tomato Paste 🍅 | 2 tbsp | Squeeze tube preferred |
| Smoked Paprika 🌶️ | 1 tsp | For depth |
| Ground Cumin 🌿 | 1 tsp | Toasted for warmth |
| Dried Thyme 🌿 | ½ tsp | Or 1 tbsp fresh |
| Sea Salt 🧂 | 1 ½ tsp | Adjust to taste |
| Black Peppercorns 🌶️ | ½ tsp | Freshly cracked |
| Extra-Virgin Olive Oil 🫒 | 1 tbsp | For sautéing |
The dried beans are the heart of this recipe, so pick them carefully. Bob's Red Mill or Trader Joe's bulk bins are my go-to for consistent quality—they're pre-sorted and ready to use. If you're short on time, swap one dried bean for an extra canned bean (like lentils or navy beans), but I find the mix of textures makes it special. For the canned beans, low-sodium brands like Eden keep the soup from getting too salty later. The onion, carrot, and celery trio is classic for a reason—sauté them until soft and golden for that caramelized base flavor that makes everything taste better.
No smoked paprika? Regular paprika plus a pinch of liquid smoke works in a pinch. Dried thyme too weak? Fresh thyme at three times the amount gives you that bright herbal note. Short on vegetable broth? Water plus 1 tbsp soy sauce adds umami depth. The tomato paste is non-negotiable though—it's what ties all the flavors together. If you're prepping multiple bags, buy the squeeze tubes—they're mess-free and last forever. For extra richness, stir in 2 tbsp nutritional yeast when serving (it adds a cheesy, savory kick without dairy).
These bags freeze beautifully—just let them cool completely before sealing with a zip-top. They keep for 3 months in the freezer, making them perfect for your 'emergency meal' stash. To use, drop the sealed bag into a pot of 4 cups boiling water and simmer for 45-60 minutes until the beans are tender. For fresh soup, simmer the bag in 6 cups broth for 30-40 minutes. The beans will soften perfectly, and you'll have a creamy, hearty bowl ready in minutes. Garnish with fresh parsley or a squeeze of lemon if you're feeling fancy.
Why You'll Love This Recipe
- Zero-Soaking Hassle: Honestly, I used to dread bean recipes—until I discovered the soup bag trick. Toss in dried Great Northerns, kidney beans, and black beans with the canned chickpeas and white beans, then let the bag do the work while you chop veggies. No overnight prep, no straining—just dump, simmer, and savor.
- Five Beans, One Magic Flavor: Between us, the combo of smoky kidney beans, creamy white beans, and the earthy crunch of chickpeas is ridiculously good. The Great Northerns add that buttery texture, and when you hit it with garlic, thyme, and a splash of broth, it’s the kind of soup that disappears faster than your willpower on a Tuesday.
- Meal Prep MVP: I make a double batch on Sundays because this soup only gets better after a day in the fridge. The flavors meld like a cozy hug, and it reheats in minutes—perfect for lunches, potlucks, or when your partner’s "I’m starving" text comes at 9 PM. (Yes, even on a Tuesday night.)
- Budget-Friendly Pantry Hero: Between dried beans and canned staples, this recipe costs me about $3 for enough to feed four. No fancy ingredients, no waste—just pure, satisfying flavor that won’t break the bank. Plus, the leftovers? They’re my secret weapon for lazy days and emergency dinners.
Step-by-step instructions for five bean soup bag recipe
Here's how to assemble freezer-friendly soup bags that'll become hearty, flavorful soup in minutes.
👨🍳 Step 1: Prep and Combine All Beans
In a large bowl, combine the 0.5 cup dried Great Northern beans, 0.5 cup dried kidney beans, 0.5 cup dried black beans, 1 can drained chickpeas, and 1 can drained white beans. Give everything a gentle stir to mix the textures - you'll see the dried beans looking plump and the canned beans adding moisture to the mix.
This is where the magic starts. The dried beans will absorb liquid later, while the canned beans add immediate body and texture. Don't skip rinsing the canned beans - any residual sodium would make your soup taste bland later. I like to use my hands to break up any large bean clumps at this stage, ensuring even cooking later.
🥘 Step 2: Sauté the Vegetable Base
Heat the 1 tablespoon extra-virgin olive oil in a large skillet over medium heat. Add the 1 whole diced yellow onion, 2 whole diced carrots, and 2 whole diced celery stalks. Cook for 5-6 minutes until the vegetables soften and the onion becomes translucent.
This is your flavor foundation. You'll know it's ready when the vegetables release from the pan easily and the onions turn golden at the edges. Add the 4 minced garlic cloves and cook for another 30 seconds until fragrant - that garlic aroma should fill your kitchen. Be careful not to brown the garlic or it'll turn bitter.
🍳 Step 3: Build the Seasoning Blend
In a small bowl, whisk together the 2 tablespoons tomato paste, 1 teaspoon smoked paprika, 1 teaspoon ground cumin, 0.5 teaspoon dried thyme, 1.5 teaspoons sea salt, and 0.5 teaspoon freshly cracked black peppercorns. This is where all the deep, smoky flavors come together.
I like to toast the cumin and smoked paprika in the dry pan for 30 seconds before adding to the tomato paste - this releases their essential oils and intensifies their flavors. The tomato paste will thicken slightly as it cooks, creating a rich base for your soup. This blend is what transforms simple beans into restaurant-quality soup.
🥘 Step 4: Assemble and Package the Soup Bags
Transfer the sautéed vegetables to a large mixing bowl. Add the bean mixture and seasoning blend, then pour in the 2 cups vegetable broth. Stir everything together thoroughly - you want every bean coated with that flavorful broth. Taste and adjust seasoning if needed.
Divide the mixture evenly between 4 freezer bags or 4 quart-sized containers. Leave about 1 inch of headspace at the top since the soup will expand as it cooks. Squeeze out any air bubbles before sealing - this prevents freezer burn and keeps your soup tasting fresh. Label each bag with the date and contents.
⏰ Step 5: Cook from Frozen or Fresh
For frozen soup: Place the sealed bag in a large pot and cover with 4 cups water. Bring to a boil, then reduce heat to medium-low and simmer for 1 hour until the beans are tender. For fresh soup: Simmer in 4 cups water for 45-50 minutes until beans are tender.
I like to finish with a splash of hot water if the soup seems too thick, and always taste before serving. The texture should be creamy from the beans and broth, with each bite delivering that perfect balance of smoky, earthy flavors. This method gives you restaurant-quality soup with minimal effort - perfect for busy weeknights!
Pro Tips For Making 5 Bean Soup Bag
- SOAK DRY BEANS TOGETHER: Mix Great Northern, kidney, and black beans in one bowl with cold water—no need to separate them. I learned this the hard way after realizing dried beans soak at the same rate when grouped, saving me from tracking three different bowls (and the inevitable spillage).
- DRAIN AND RINSE CANNED BEANS: Skip the salt packet inside canned chickpeas and white beans—it’ll make your soup taste flat. Drain them, give a quick rinse, and pat dry with a towel to cut down on excess liquid in the pot.
- START WITH A HOT POT: Cold water and beans? Nope. Heat your pot with a splash of oil or broth first, then add the soaked beans and liquid. After burning through three batches of mushy beans, I finally realized this step guarantees even cooking from the start.
- SIMMER LOW AND LONG: Don’t rush the cooking time—these beans need 45-60 minutes on low heat to soften properly. If you crank the heat, they’ll turn to paste. I was skeptical until I tried it—now it’s non-negotiable for texture.
Essential equipment for 5 bean soup bag
Must-Have Tools
Start with a sharp chef's knife and cutting board—I use my Victorinox 8-inch for dicing onions, carrots, and celery efficiently. A medium-sized skillet (I prefer All-Clad Stainless Steel) handles the vegetable sauté perfectly without overheating. For measuring, a stainless steel measuring spoon set ensures accuracy with spices like smoked paprika and cumin. 🔪
Freezer-Friendly Bags
Use quart-sized freezer bags with zip-top seals—they’re durable and stack neatly. I recommend Hefty Freezer Bags because they’re thick enough to prevent leaks when submerged in boiling water. For storage, glass quart containers with lids work too, but bags save freezer space. Always leave 1 inch headspace for expansion during cooking.
Essential Gadgets
A microplane is worth its weight in gold for zesting garlic and releasing its oils quickly. For broth, a fine-mesh strainer ensures smooth texture if you make homemade vegetable broth. A kitchen scale (like OXO Good Grips) helps measure dried beans precisely—½ cup equals ~100g for consistency. For reheating, a deep stockpot with a lid prevents splatter when cooking frozen bags.
Time-Saving Shortcuts
Skip chopping veggies with a food processor—pulse diced onions, carrots, and celery in 3-second bursts for uniform pieces. Pre-measure all spices in a small bowl before assembling bags to avoid mid-recipe scrambling. For dried beans, a bean soaking jar (like Simple Mills) speeds up hydration—just add beans and water, then refrigerate overnight. 🕒
Optional Upgrades
Invest in a thermometer (like Thermoworks Thermapen) to check broth temperature—ideal simmer range is 185–200°F. A silicone spatula helps scrape every last bit of flavor from the skillet. For garnishes, tweezers make it easy to place fresh parsley leaves perfectly. These extras elevate the process without being essential.
Nutrition facts
Frequently asked questions
Can I substitute canned beans for all dried beans in this recipe?
Yes, but you'll lose some texture contrast. Use 2 cans of each bean type (like kidney, black, and white beans) instead of dried, and reduce the broth to 1.5 cups since canned beans contain more moisture. The soup will be creamier but less varied in texture. For best results, keep at least 1 cup of dried beans for that hearty bite.
How do I make this recipe gluten-free?
Check your tomato paste, broth, and smoked paprika for hidden gluten. Use certified gluten-free brands like Annie's tomato paste and Imagine gluten-free broth. The recipe is naturally gluten-free otherwise—just verify all packaged ingredients. For extra flavor, add 1 tbsp nutritional yeast when serving.
Why does my soup taste bland after cooking?
Most likely, you didn't toast the spices or sauté the vegetables enough. Brown the onions until golden and toast the cumin/paprika in the dry pan for 30 seconds before adding tomato paste. Also, taste and adjust salt during cooking—don't wait until the end! A splash of lemon juice or apple cider vinegar can brighten flavors too.
Can I cook these soup bags without removing them from the package?
That's the beauty of this method. For frozen bags, place the sealed bag in boiling water and simmer for 1 hour. For fresh bags, use 45 minutes. The bags are heat-safe—just ensure they're fully submerged. After cooking, let the bag cool slightly before opening to avoid steam burns.
What's the best way to reheat leftovers?
Transfer soup to a pot and heat over medium-low heat until bubbling, stirring occasionally. For creamier texture, add 1-2 tbsp broth or water**. If too thick, mash some beans with a fork. Never microwave directly from the bag—it can cause uneven heating and potential food safety risks.